OCA Lamination Machine Installation Guide: Step-by-Step Setup
In the mobile repair industry, OCA (Optically Clear Adhesive) lamination machines are essential for professional screen refurbishing. Whether you’re repairing a cracked display or replacing glass, the OCA machine ensures a bubble-free, smooth, and high-quality finish just like a brand-new phone screen.
However, installing an OCA lamination machine for the first time can seem confusing. From setting up the air compressor and vacuum pump to calibration and testing, every step matters.
Our mobile repairing training institute teaches complete OCA machine operation, lamination techniques, bubble removal calibration, and more.
These detailed step-by-step guide will walk you through the complete installation process of an OCA lamination machine, including essential tools, safety precautions, and setup tips to help you get professional results every time.
What is an OCA Lamination Machine?
An OCA lamination machine is an essential tool used in mobile display refurbishing to apply an Optically Clear Adhesive (OCA) film between the touch glass and the LCD screen. This adhesive layer bonds the two components together, making them appear and function as a single, seamless unit just like a brand-new screen.
The machine plays a key role in:
- Removing air bubbles trapped between the glass and the display.
- Ensuring perfect alignment during the bonding process.
- Providing a clear, smooth, factory-like finish to the refurbished screen.
Before OCA lamination, technicians also check the top mobile components to test before repairing to ensure smooth display refurbishment.
OCA lamination machines are widely used for refurbishing both LCD and OLED screens in popular smartphone brands such as Apple iPhone, Samsung, OnePlus, and other major models. By using this machine, technicians can restore broken or damaged displays to their original clarity and touch quality with professional precision.
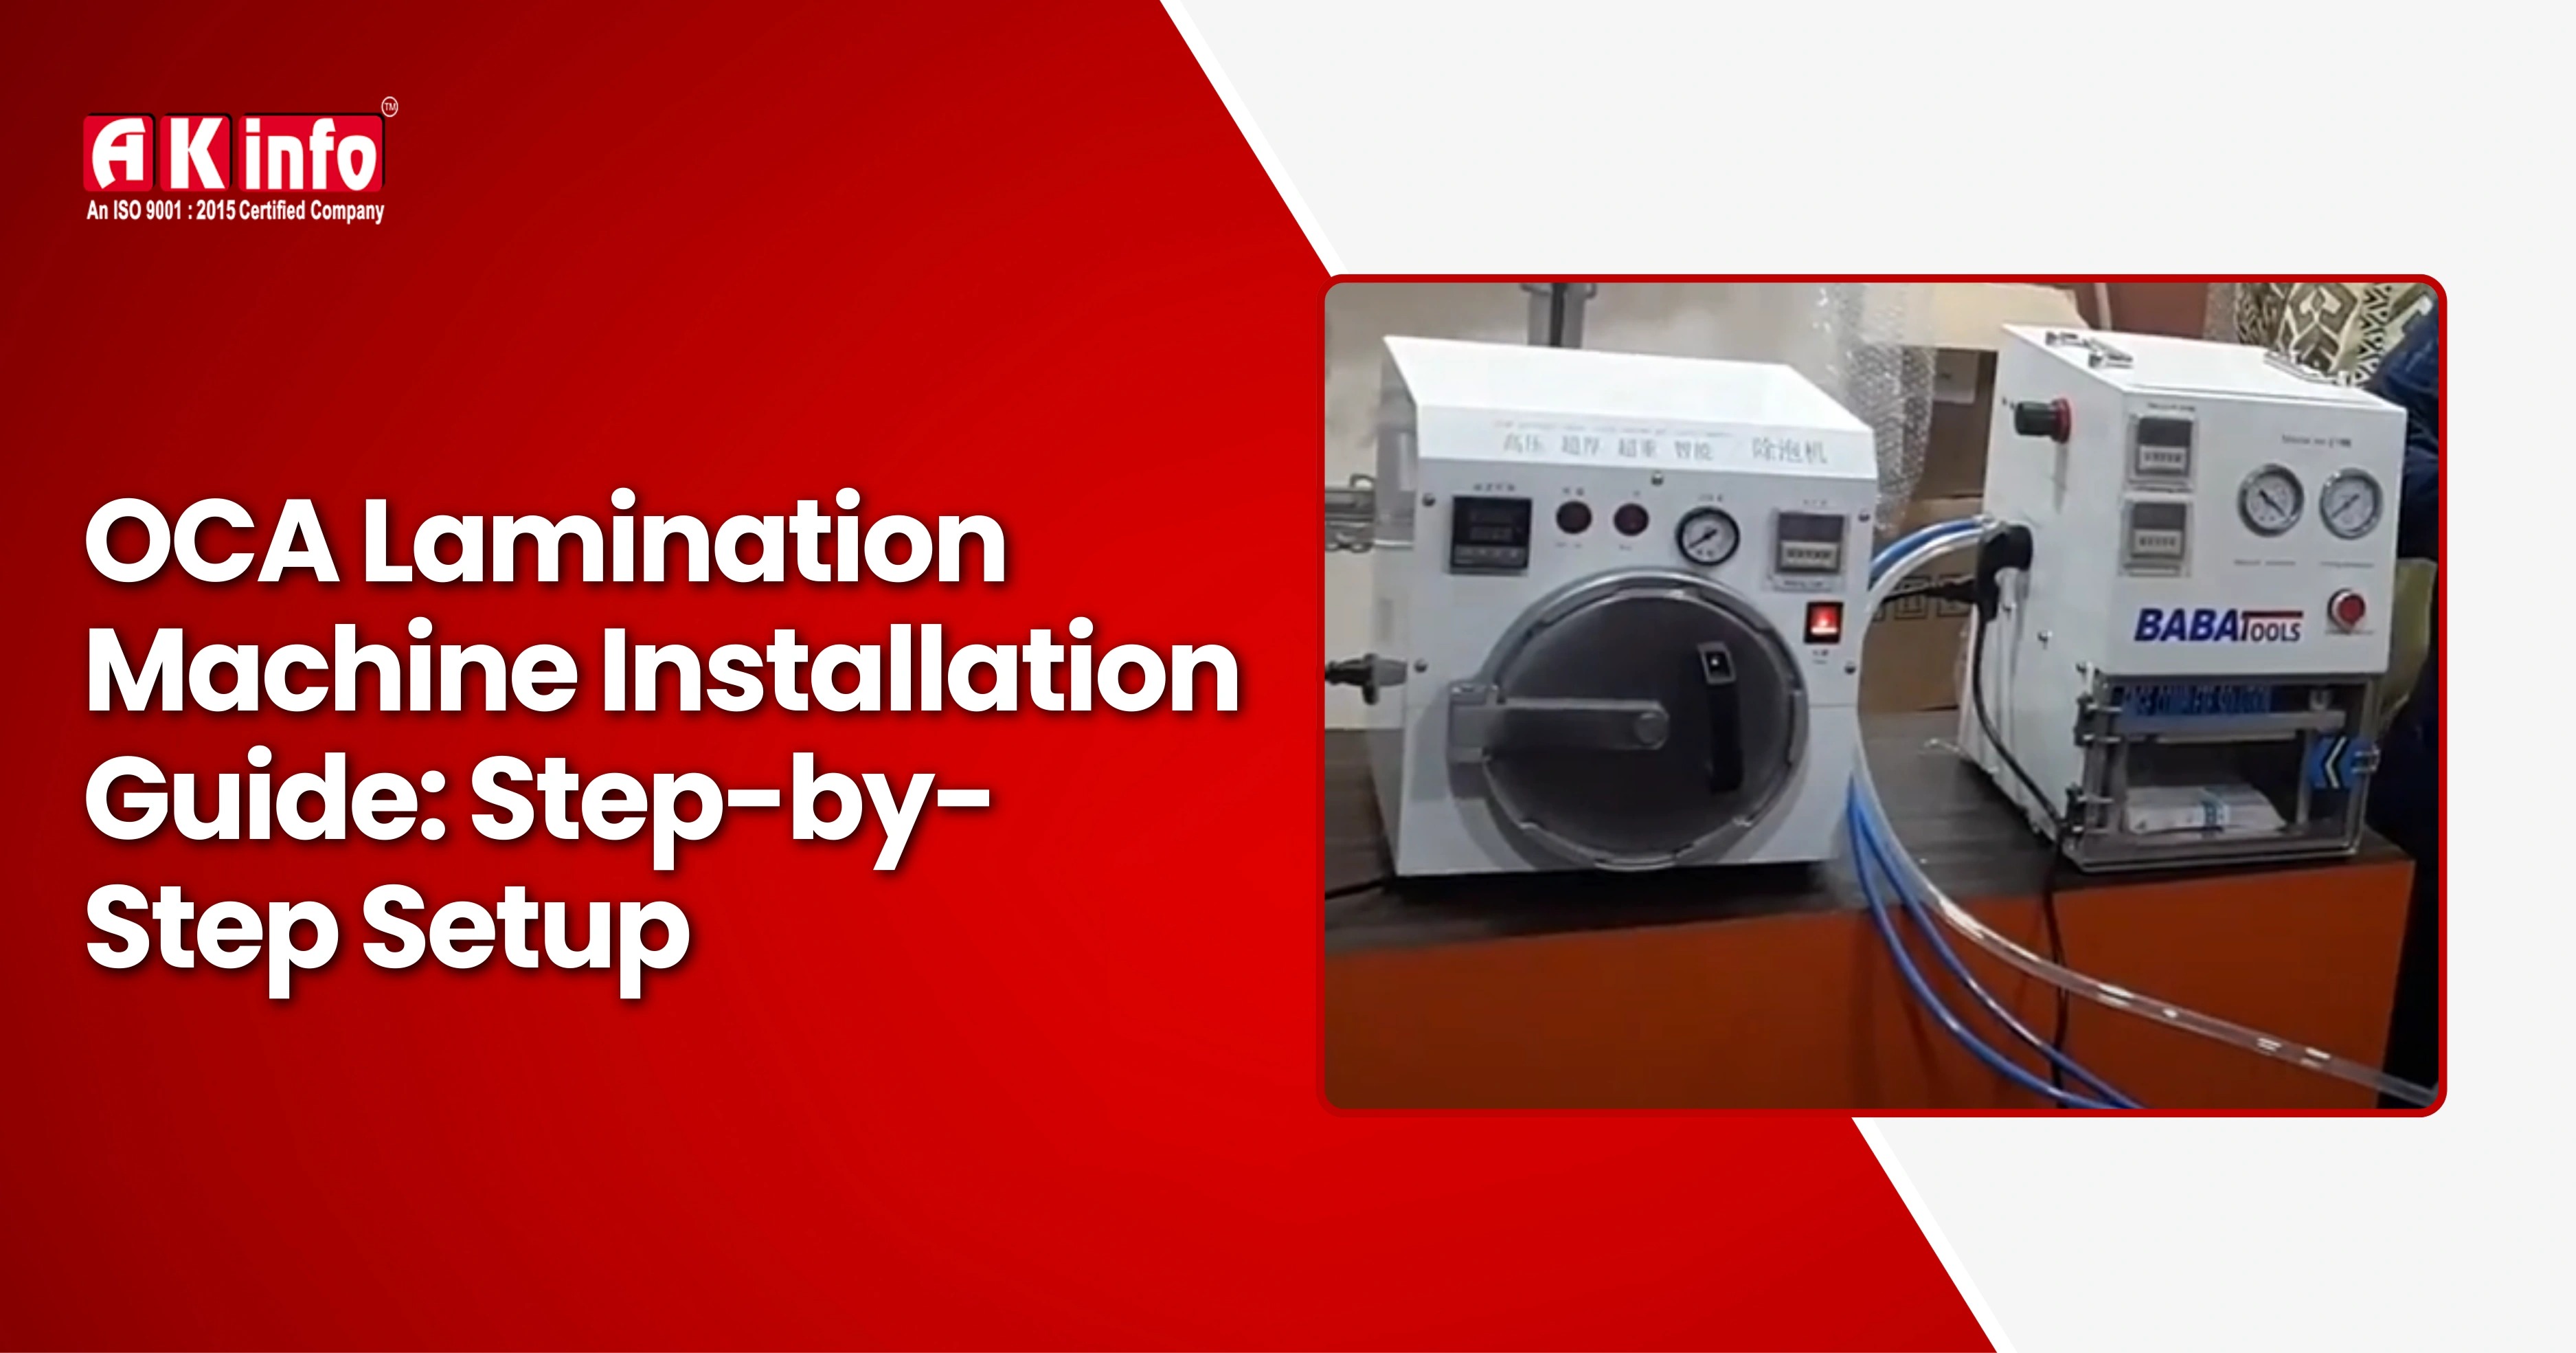
Key Components of an OCA Lamination Setup
Before installation, make sure you understand all the components involved in a complete OCA setup.
- OCA Lamination Machine (Main Unit): The central machine where lamination takes place.
- Vacuum Pump: Creates the vacuum pressure needed for bubble removal.
- Air Compressor: Provides compressed air to operate pneumatic functions.
- Air Filter and Regulator: Controls air quality and operates pneumatic functions.
- Power Supply: Usually 220V (check machine label before connection).
- Heating Plate (optional): Used for preheating the glass for better lamination.
- Touch Panel/Control System: Controls vacuum time, lamination pressure, and temperature.
For best results, always use high-quality OCA sheets and original components. The benefits of using genuine parts in mobile repair directly impact screen clarity and long-term performance.
Tools & Equipment Required for Installation of OCA Lamination Machine
Before starting the installation or repair process, having the right tools and equipment is essential for achieving professional and reliable results. Understanding the essential tools for mobile repairing training can help beginners use the OCA machine more confidently. Here’s a complete list of the basic equipment you’ll need for OCA lamination setup and installation:
- OCA Lamination Machine (Main Unit): The core equipment used for laminating touch panels and display glass.
- Vacuum Pump: Removes air bubbles from between layers during lamination.
- Air Compressor: Supplies the necessary air pressure for smooth and consistent operation.
- Air Filter and Moisture Separator: Keeps the air supply clean and dry, preventing contamination or defects during lamination.
- Pressure Regulator: Controls and maintains the required air pressure for stable machine performance.
- Silicone Pipes and Connectors: Used to connect the air and vacuum lines securely.
- Electrical Power Cord (as per voltage requirement): Ensures proper power connection for safe machine operation.
- Screwdrivers, Wrench Set, and Teflon Tape: Essential hand tools for assembly, fitting, and maintenance.
- OCA Sheets, Cleaning Cloths, and Testing Glass: Used for preparing, cleaning, and testing the display after lamination.
Step-by-Step Installation OCA Lamination Machine Guide
Setting up your OCA lamination machine correctly ensures safe operation and perfect screen results. Follow these steps carefully for a professional and trouble-free installation.
Step 1: Choose the Right Installation Space
Select a clean, dust-free, and air-conditioned room for setup. Place the machine on a flat, stable surface to prevent vibration. Ensure proper ventilation for the air compressor and vacuum pump, and keep at least 1 meter of free space around the setup for maintenance and airflow.
Step 2: Unboxing and Inspection
Unbox all components carefully. You should have the main lamination unit, vacuum pump, air compressor, bubble remover, and all pipes and accessories. Inspect each item for any shipping damage and ensure that all parts match your model specifications.
Step 3: Setting Up the Air Compressor
The air compressor provides the pressure needed for lamination and bubble removal. Place it near the machine (but not too close to avoid heat). Connect the air output pipe to the air filter or moisture trap using Teflon tape to prevent leaks. Set the pressure between 6–8 bar (90–120 psi) and test for stable airflow.
Tip: Drain water from the compressor tank daily to avoid moisture buildup.
Step 4: Installing the Vacuum Pump
The vacuum pump removes air from the lamination chamber for bubble-free results. Connect the vacuum hose securely from the pump to the machine’s vacuum port and tighten the clamps. Plug in the power cable and run a quick test. A steady humming sound indicates correct operation. Check all joints for air leaks.
Step 5: Connecting Air Pipes and Fittings
- Compressor → Air Filter → OCA Machine “Air IN”
- Vacuum Pump → OCA Machine “Vacuum IN”
- OCA Machine “OUT” → Bubble Remover
Use soapy water on joints to check for leaks — bubbles mean air is escaping.
Step 6: Electrical Power Connection
Before powering up, verify your machine’s voltage (commonly 220V/50Hz). Use a properly grounded outlet and surge protector. Avoid thin or loose wires. Connect all units—laminator, vacuum pump, compressor, and bubble remover—to their power sources. Switch them on one by one to confirm proper power flow.
Step 7: Calibrating Machine Settings
- Pressure: 6–7 bar
- Vacuum Time: 20–30 seconds
- Lamination Time: 20–40 seconds
- Temperature: 35–40°C
Always refer to your user manual for model-specific settings.
Step 8: Testing the Lamination Function
Perform a dry run before laminating actual screens. Place a sample glass and LCD in the chamber, close the lid, and start the cycle. Check if the vacuum, pressure, and plate movement work smoothly and the cycle completes without errors.
Step 9: Installing & Testing the Bubble Remover
The bubble remover (autoclave) removes tiny trapped air pockets after lamination.
Connect it to the compressor’s air output, set the pressure to 6–8 bar, and run it for 10–15 minutes with the laminated screen inside. If the screen comes out clear and bubble-free, installation is successful!
Step 10: Cleaning and Maintenance
Proper maintenance keeps your system running efficiently. Daily, clean the lamination plate, drain compressor moisture, and check vacuum and air pressures. Weekly, inspect pipes, clean vacuum filters, and test the bubble remover valve. Monthly, replace dirty air filters and tighten all electrical and air fittings.
With these steps, your OCA lamination machine will be fully installed, calibrated, and ready for professional mobile display refurbishing with clean, bubble-free results.
Conclusion
Installing an OCA lamination machine may seem technical at first, but with proper guidance and careful setup, it’s straightforward. By following this step-by-step installation guide, you can ensure safe operation, accurate lamination, and long-lasting performance.
If you want to learn practical OCA installation and display refurbishing, our mobile repairing course in Patna offers hands-on workshops with advanced machines.
Whether you’re a beginner in mobile repair or an experienced technician expanding your workshop, setting up your lamination machine correctly is a crucial investment in quality and reliability. Get your tools ready, follow the steps carefully, and start creating professional-grade screen repairs that look and feel brand-new!
Frequently Asked Questions
Most machines operate on 220V AC (India) or 110V AC (US). Always check the label before connecting power.
Yes, but ensure it delivers at least 6–8 bar pressure and includes a moisture filter to keep the air dry.
A complete installation usually takes 2–3 hours, including testing and calibration.
Yes, a bubble remover machine is essential for perfect lamination. It removes microbubbles left after the main process.
Clean the machine daily, check filters weekly, and service the compressor monthly for best results.